Living Sweet Moments

Delicious and easy recipes from scratch

  • About
    • About Me
    • Honors And Mentions
  • Recipes
    • Instant Pot Recipes
    • Breakfast/Brunch
    • Snacks
    • Beverages
    • Appetizers
    • Breads
    • Salads
    • Side Dishes
    • Soups
    • Entrees
      • Meats
      • Pasta
      • Poultry
      • Seafood
      • Vegetarian
      • Stuffed Eggplant Recipes
    • Best Cake Recipes
    • Desserts
      • Brownies/Bars
      • Fudge
      • Mousses
      • Cakes
      • Cookies
      • Cupcakes
      • Frozen
      • Donuts/Quick Breads
    • Spreads
    • Venezuelan Recipes
    • Jewish
    • Holidays
      • Valentine’s Day
      • Halloween
      • Christmas
  • Recipe Index
  • Daily Living
    • Parenting
    • Household Tips
    • Money Saving Tips
    • DIY Projects
    • Random Thoughts
  • Entertainment
    • Movie Reviews
    • Celebrities I’ve Interviewed
    • Entertainment News
  • Travel
  • Contact Me
You are here: Home / Recipes / Holidays / Cute Chocolate Bunny Filled With Sixlets

Cute Chocolate Bunny Filled With Sixlets

April 3, 2015 by Tiffany Leave a Comment

Yum5
Tweet2
Share
Pin148
Email
Share
Reddit
Buffer
155 Shares
Jump to Recipe Print Recipe

Cute Chocolate Bunny Filled With Sixlets - Perfect sweet treat for your Easter celebration. Very simple to make and so delicious. Kids will love their bunny

Cute Chocolate Bunny Filled With Sixlets

Ins’t this guy adorable? He’s all made out of chocolate will a hollow interior, perfect for filling him out with your child’s favorite candy.

Don’t worry, making them is very easy! I will guide you with a step-by-step guide so you can see exactly how everything is made.  Your Easter celebration will look so pretty with a Cute Chocolate Bunny Filled With Sixlets.

Now that you have learned this technique, you can make any chocolate hollow shape you may like and fill it out with candy, treats, or even little chocolate bonbons inside. YUM! These would make beautiful decorations for a party or even favors.

Here’s what you need to get started:

chocolate-bunny-recipe-process-6

White Chocolate Chips, Sixlets, Purple food coloring (or red and blue to make purple), and a 2 sided plastic bunny mold.

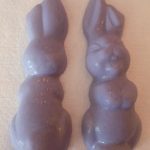
To start, all you need to do is melt the white chocolate chips and color them with the food coloring little by little to achieve your desired purple hue. Or any color of your choice.

Then, with the use of a spoon or a small spatula, spread the chocolate all over the mold on both sides. You will be working with 2 molds that will come together when dry:

Cute Chocolate Bunny Filled With Sixlets - Perfect sweet treat for your Easter celebration. Very simple to make and so delicious. Kids will love their bunny

Do not fill the mold to the top, because you want to leave room for your pearl sixlets. The idea is to create a hollow bunny so we can later fill it with candy.

Tap the mold against your countertop to ensure any visible air bubbles at the front of each mold are eliminated. Lift the mold above your head to check for air bubbles.  Once all of the air bubbles are removed, tilt the mold back and forth to allow the chocolate to spread evenly and along the sides. Next, take a small spoon or unused paintbrush and distribute the chocolate evenly onto the sides of the bunny. Ensure that the sides are not too thin or they will break upon removal from the mold.

Freeze for 20 to 30 minutes or until the chocolate inside the bunnies has set. Place it on the countertop and gently pop the front and back molds from the plastic. Place them onto a baking sheet or a large plate.
Cute Chocolate Bunny Filled With Sixlets - Perfect sweet treat for your Easter celebration. Very simple to make and so delicious. Kids will love their bunny
See how cute and shiny they look? Now the best part! Let’s fill them up with some sixlets:
chocolate-bunny-recipe-process-3
We are almost done! All we need to do is to put the front and back together.
To glue the 2 sides, you need to melt a little more of the chocolate chips and tint them in the same purple hue. Then use a small paintbrush or a pastry bag with a small hole and gently spread the glue on the edges of the bunny.
Then place the other part of the back part over the front part ensuring that the sides align perfectly.
Freeze for a few minutes and enjoy!
Cute Chocolate Bunny Filled With Sixlets - Perfect sweet treat for your Easter celebration. Very simple to make and so delicious. Kids will love their bunny
See? easy! Once you make one, the second and third you will be an expert bunny maker.
Cute Chocolate Bunny Filled With Sixlets - Perfect sweet treat for your Easter celebration. Very simple to make and so delicious. Kids will love their bunny
Print Recipe
5 from 1 vote

Cute Chocolate Bunny Filled With Sixlets

Total Time1 hour hr 15 minutes mins

Ingredients

  • 2 Cups White Chocolate Baking Chips
  • ½ Cup Chocolate Pearl Sixlets
  • 1 Medium Two-Sided Plastic Bunny Mold
  • Red & Blue Food Coloring or Purple if you can find it

Instructions

  • Add 1½ cup of white chocolate baking chips to a medium microwavable mixing bowl. Heat in the microwave for 30 seconds. Remove and stir. Microwave twice more at 30 seconds each time, stirring in between, or until completely melted. Heating for short periods (such as 30 seconds at a time) and continuously stirring helps to ensure the chocolate does not burn. Remove from the microwave and stir until chocolate is completely smooth and silky. There may be a few air bubbles throughout
  • In this recipe, I added 1-2 drops of red food coloring and 1-2 drops of blue food coloring to create a shade of purple. However, I also highly recommend purchasing Wilton’s paste-based food coloring. You can buy purple by itself or in a multi-color pack. Stir the melted chocolate until the color is evenly distributed and as desired
  • Be certain that your plastic bunny mold has been cleaned and dried completely. If there are water or debris in the mold this will ruin the appearance of the chocolate bunny
  • Slowly pour, or spoon in, the melted chocolate into the front and back molds. Do not fill the mold to the top, because you want to leave room for your pearl sixlets. Remember, you are creating a hollow bunny!
  • Tap the mold against your countertop to ensure any visible air bubbles at the front of each mold are eliminated. Lift the mold above your head to check for air bubbles. If there are none, you may proceed to the next step
  • Once all of the air bubbles are removed, tilt the mold back and forth in order to allow the chocolate to spread evenly and along the sides. Next, take a small spoon or unused paintbrush and distribute the chocolate evenly onto the sides of the bunny. Ensure that the sides are not too thin or they will break upon removal from the mold
  • Place the filled plastic bunny mold in the freezer for approximately 20 to 30 minutes. Remove the mold from the freezer. Wear candy-making gloves if you have them (they eliminate fingerprints). Lightly touch the inside of the mold to ensure it is solid. Place it on the countertop and gently pop the front and back molds from the plastic. Place them onto a baking sheet or a large plate
  • Add pearl sixlets to the hollow center of the front OR back mold (do not fill both sides)
  • Add ½ cup white chocolate baking chips to a small microwavable mixing bowl. Heat in microwave for 30 seconds. Remove and stir. If needed, microwave for another 30 seconds or until completely melted. But, again, be careful that the chocolate does not burn. Remove and stir until the chocolate is completely smooth and silky
  • Add 1 drop of red food coloring and 1 drop of blue food coloring to create a shade of purple that matches the body of the bunny. Stir the melted chocolate until the color is evenly distributed and as desired
  • Take a small spoon, unused paintbrush, OR icing bag (with a tiny round icing tip) and distribute a small string of chocolate along the rim of the front or back bunny molds (you don’t need to do both sides). Take the side that is not filled with pearl sixlets and press it onto the opposite side, ensuring that edges match perfectly. Carefully place the pearl sixlet filled bunny onto a plate and into the freezer for approximately 20 minutes. Remove the bunny from the freezer. Gently touch the edges to ensure the mold is securely sealed
  • If you have a bumpy seam, take a small, sharp knife and gently etch away at the bumps. Be sure not to press too firmly or etch away at the chocolate too much as holes will form
  • Lightly dampen a paper towel with cool water and wipe away excess chocolate flakes at the seam. You’ve done it – you have created a molded purple (white chocolate) Easter bunny filled with delightful pearl sixlets!
 
Yum5
Tweet2
Share
Pin148
Email
Share
Reddit
Buffer
155 Shares

Filed Under: Holidays, Recipes

« Asian Style Short Ribs
Soba Noodles With Edamame And Spring Veggies »

Disclosure: This post may contain affiliate links. I receive a small commission at no cost to you when you make a purchase using my link.

Get More Updates!

Sign up to get exclusive updates & tips!

Privacy Policy
5 from 1 vote (1 rating without comment)

Leave a Reply Cancel reply

Your email address will not be published. Required fields are marked *

Recipe Rating


This site uses Akismet to reduce spam. Learn how your comment data is processed.

Follow Me:

  • Bloglovin
  • Facebook
  • Instagram
  • Pinterest
  • Twitter
  • YouTube

Search This Blog

Categories

Popular Recipes

This decadent No Bake Chocolate Biscuit Cake recipe is made with condensed milk

Decadent No Bake Chocolate Biscuit Cake

These delicious popcorn bars has a chewy peanut butter cookie crust and is topped with salted caramel fudge popcorn. The perfect dessert for kids & parties

Peanut Butter Caramel Popcorn Bars

This delicious Apple Noodle Kugel recipe is both sweet and savory. This recipe is dairy free and parve

Sweet And Savory Apple Noodle Kugel

Flower Pot Cookies - Chocolate Chip Cookie cups filled with hazelnut chocolate and topped with crushed chocolate cookies. Welcome Spring with yummy cookies.

Super Cute Flower Pot Cookies

Chia Fruit And Nut Bar Recipe

More yummy Recipes..

LSM Cooking Channel

Newsletter

Subscribe for email updates!

Privacy Policy
  • Bloglovin
  • Facebook
  • Instagram
  • Pinterest
  • Twitter
  • YouTube
my foodgawker gallery

Welcome!

Hello! I am Tiffany, the blogger, cook and photographer of Living Sweet Moments.
I a married and have 2 little girls. We currently live in Miami, Fl
I spend my days cooking and baking delicious recipes that you will surely love. So sit back and enjoy! Read More…

  • Bloglovin
  • Facebook
  • Instagram
  • Pinterest
  • Twitter
  • YouTube

More From the Blog

Elevate your Thanksgiving table with this delicious Hazelnut Praline Pumpkin Pie served on a flaky homemade crust 
Easy enough for weeknight, and fancy enough for entertaining, these cheesy Chicken Asparagus Crepes are delicious and will leave you satisfied 
These White Chocolate Macadamia Cookies are soft, chewy, and full of flavor. Perfect as a dessert for any celebration
This delicious and moist pumpkin loaf recipe is topped with tangy cream cheese frosting and crystallized ginger pieces. It's perfect for breakfast, snack, or dessert! 
This delicious and moist lemon loaf is super easy to make and is drizzled with lemon syrup and tangy lemon icing. Perfect with tea or coffee
  • Home
  • Contact Me
  • About Me
  • Disclosure
  • Privacy Policy

Copyright © 2025 · Foodie Pro Theme by Shay Bocks · Built on the Genesis Framework · Powered by WordPress

Rate This Recipe

Your vote:


A rating is required
A name is required
An email is required

Recipe Ratings without Comment

Something went wrong. Please try again.