Beginner sourdough bread recipe with video guide, easy timeline, salt tips, scoring & Dutch oven. Same-day mild or overnight deeper flavor
Starter Sourdough Bread Recipe (Beginner Friendly)
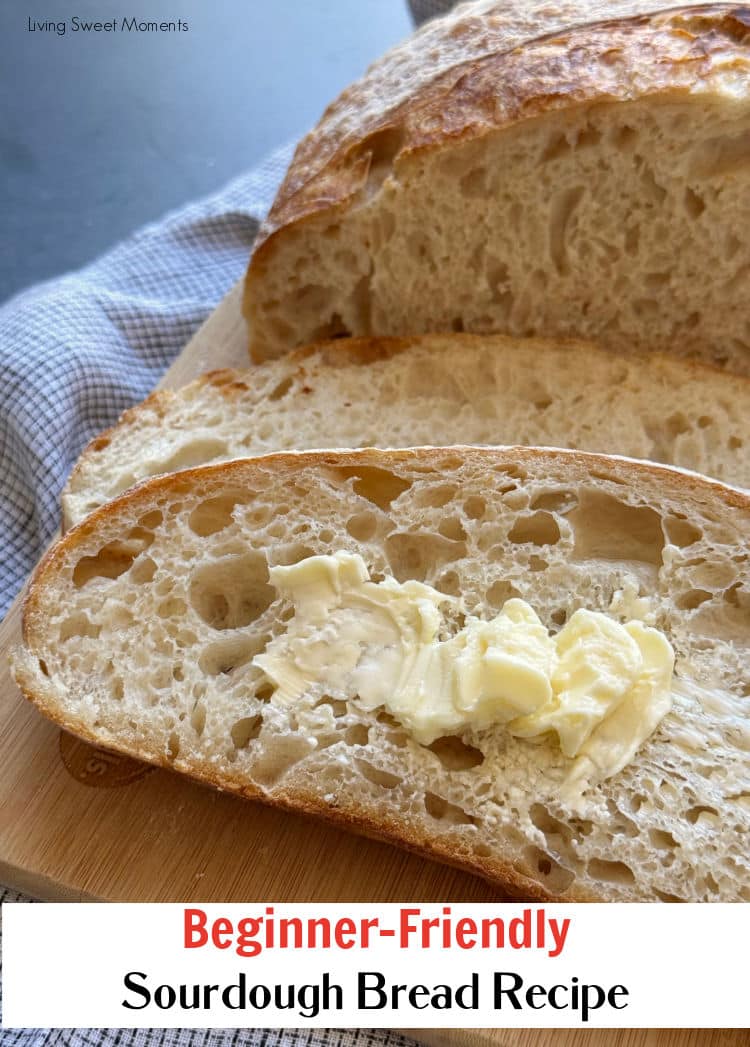
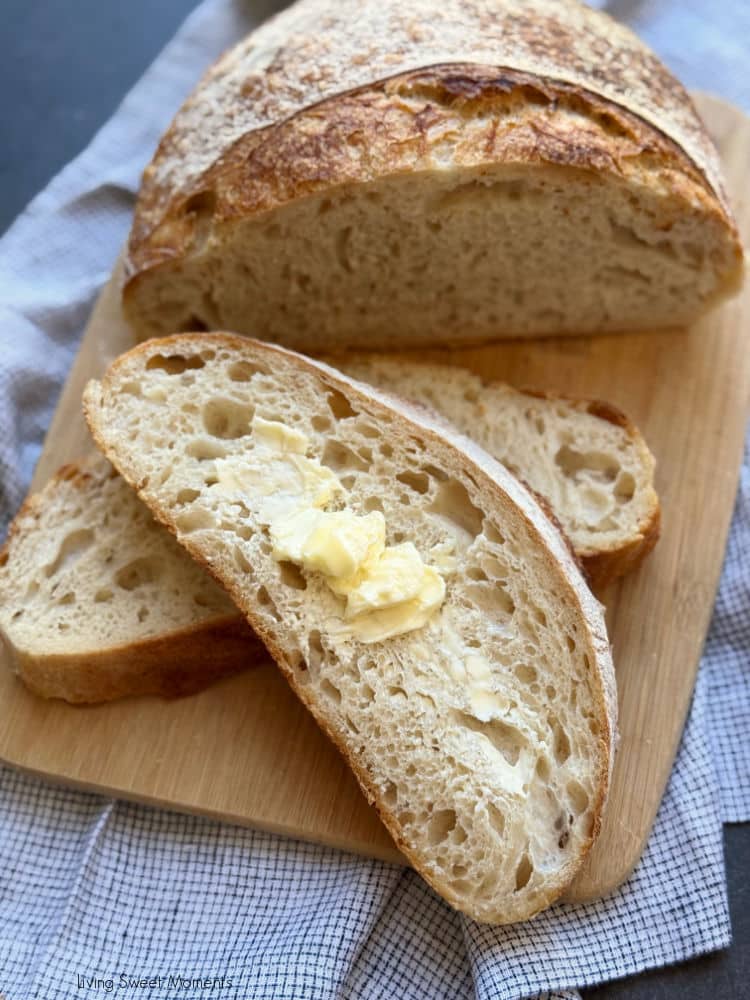
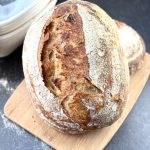
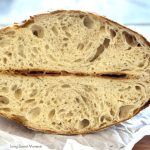
Sourdough can feel intimidating, but this starter sourdough bread recipe is built for beginners. With lower hydration (325 g water, 500 g bread flour, 100 g starter, 10 g salt), the dough is easier to handle, shape, and bake. The process takes patience—don’t be intimidated! You’ll be rewarded with a chewy crumb, mild tang, and a golden, crackly crust.
New to sourdough? Start with my complete sourdough starter guide here where I walk you through everything step by step.
Watch the Video
📹 A step-by-step video is HERE It will walk you through mixing, turns, shaping, scoring, and baking. I’ll embed it here when it’s live.
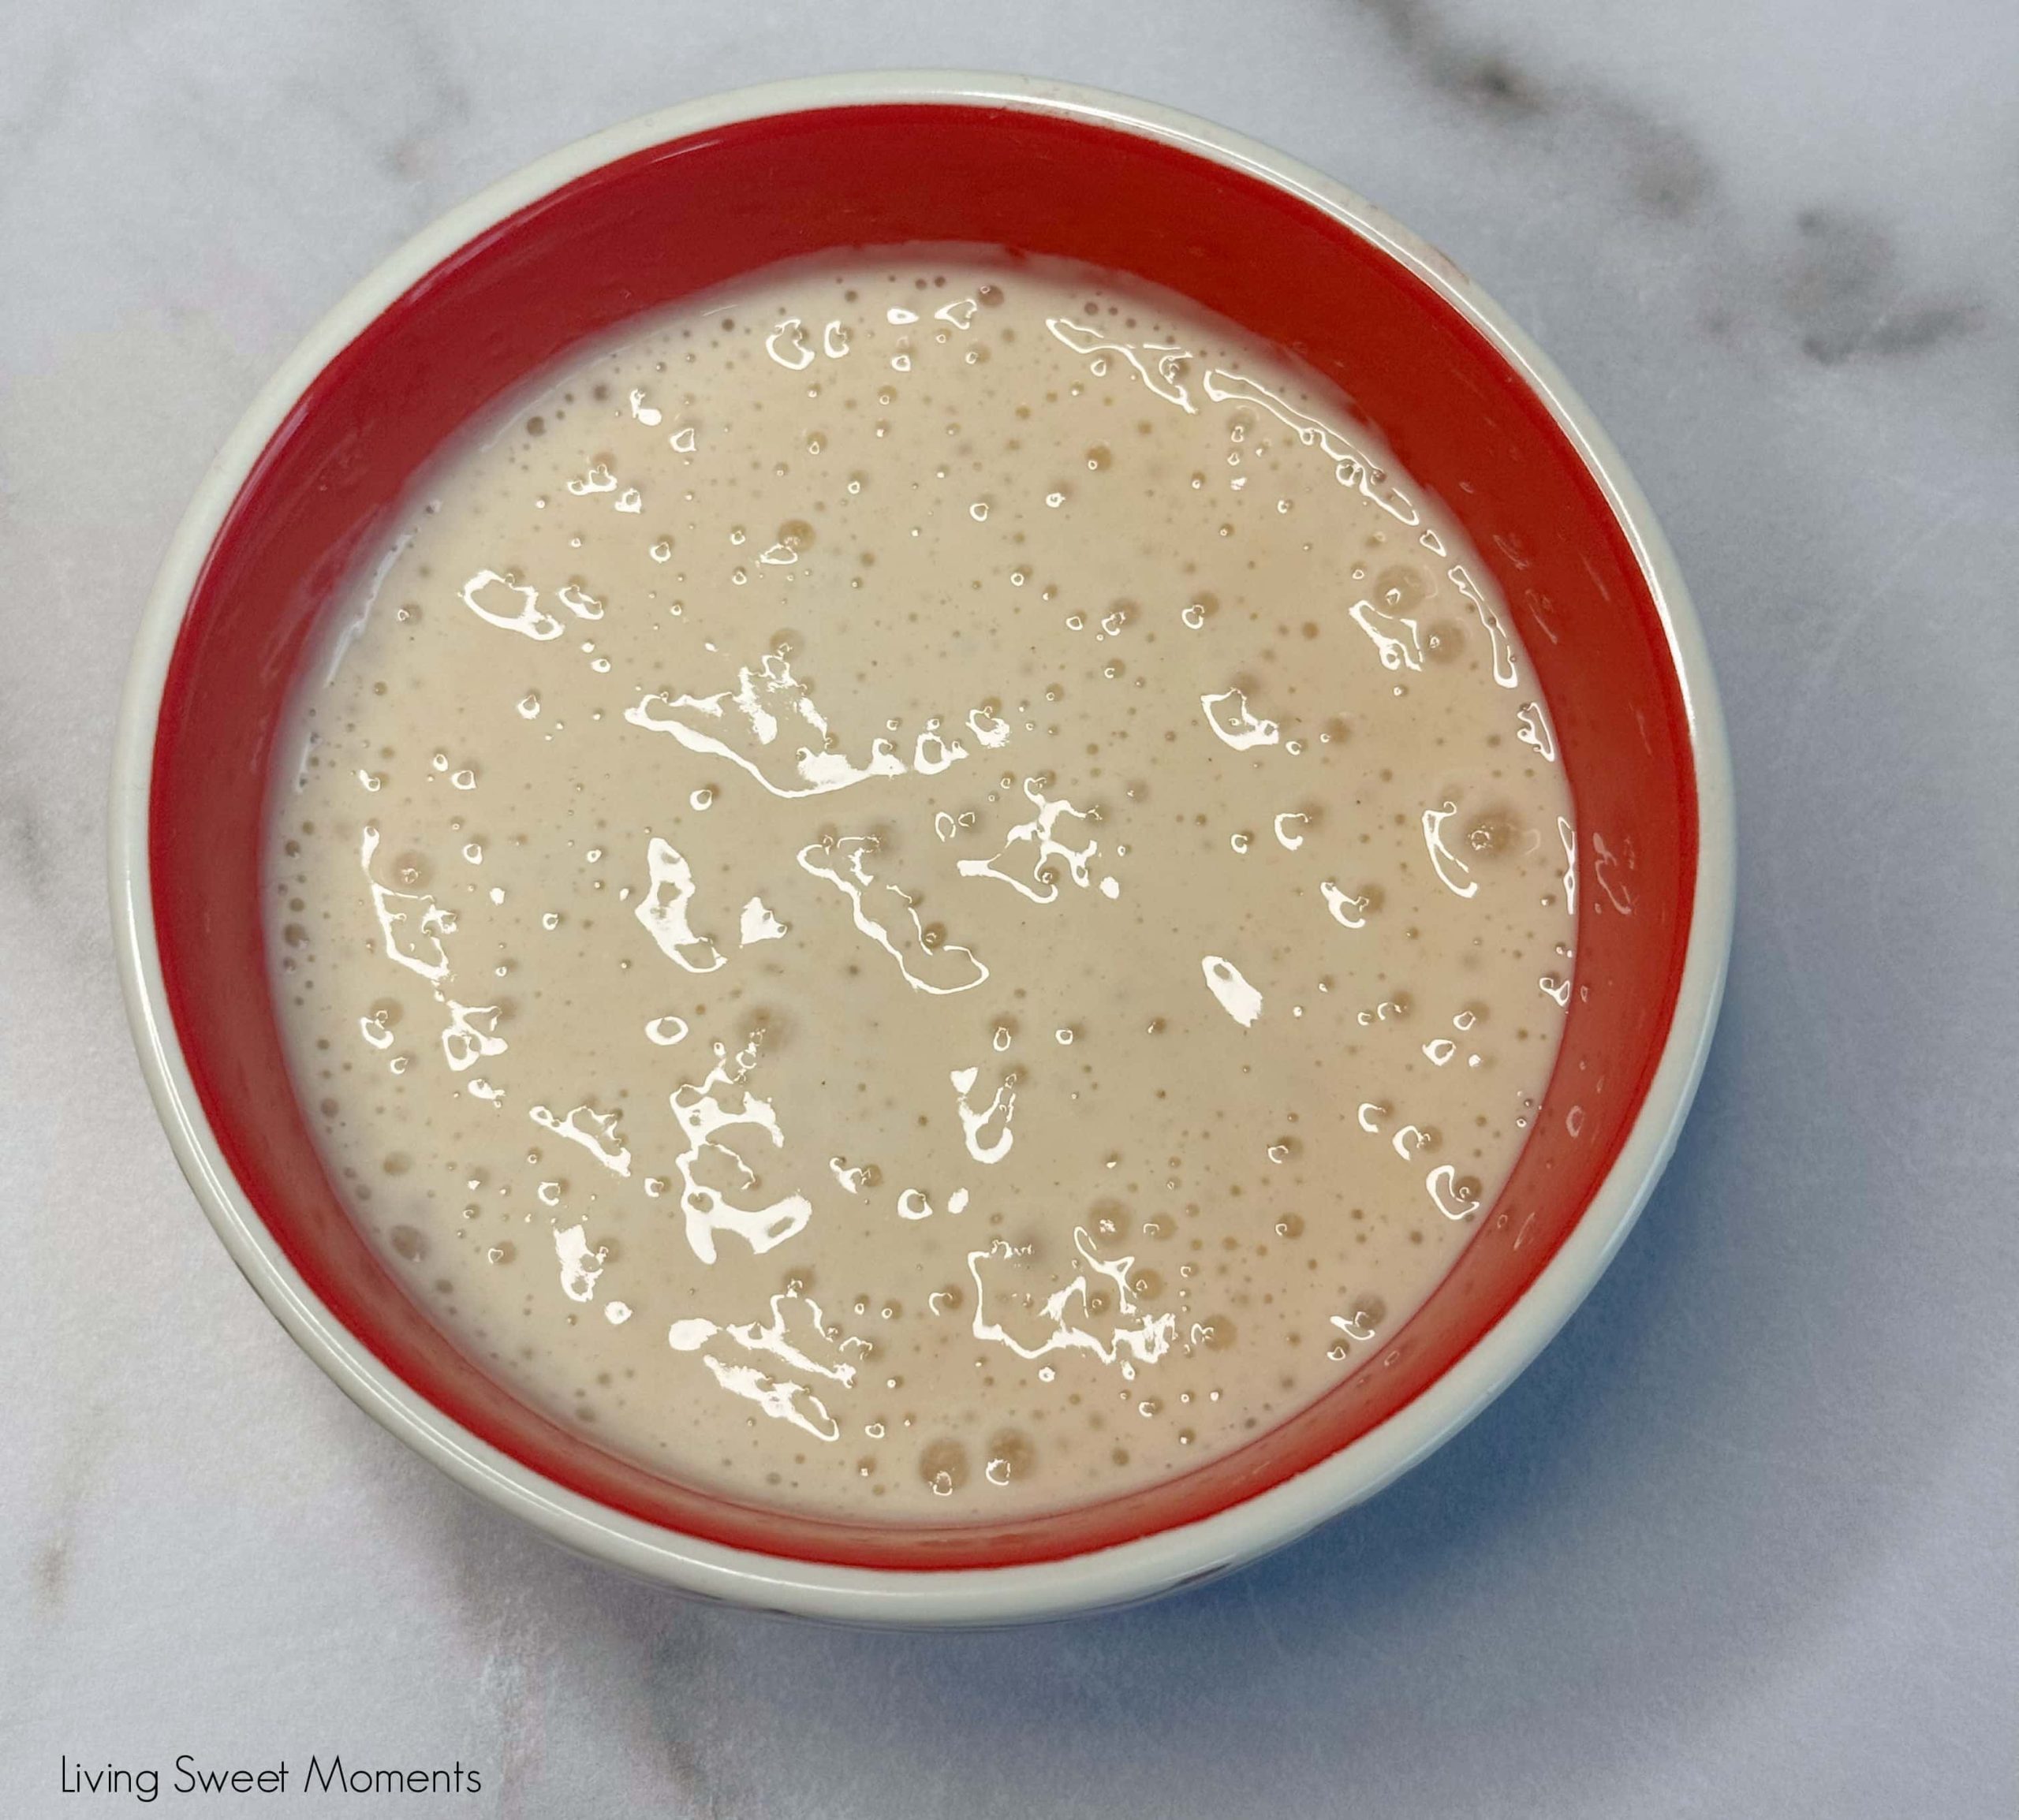
Make Sure Your Starter Is Active
Your starter should be bubbly, doubled since feeding, slightly domed, and a spoonful should float in water. Using an inactive starter often leads to a dense loaf. This recipe is part of our Sourdough Starter Series for feeding and troubleshooting guidance.
If you don’t have an active starter yet, follow my step-by-step sourdough starter guide.
Equipment You’ll Need
- Mixing bowl
- Kitchen scale
- Dough/bench scraper (optional but helpful)
- Banneton or a medium bowl lined with a floured kitchen towel (rice flour is best)
- Sharp lame/razor for scoring
- Dutch oven or heavy-lidded pot
Step-by-Step Timeline (Customize to Your Day)
This is an example schedule. Shift the times to suit your day—the order matters more than the clock.
What Is Autolyse?
Autolyse is mixing flour, water, and starter, then resting before adding salt. This rest kicks off gluten, reduces stickiness, and makes the dough smoother and easier to handle.
What Are “Turns” (Stretch & Folds)?
Every ~30 minutes, wet your hands (prevents sticking), lift one side of the dough, stretch it up, and fold it over. Rotate the bowl and repeat 3–4 times. With each turn, the dough should feel more relaxed and elastic.
- First turn: the dough is shaggy and uneven.
- Second/third: dough becomes more relaxed and elastic.
- Fourth: smoother, lighter, and bouncier.
Bulk Fermentation: What to Look For
This is the dough’s main rise. Yeast provides lift while bacteria build flavor.
- Volume increases by about 50% (not quite double)
- Surface looks smoother and slightly domed
- Tiny bubbles visible at edges/surface
- Dough has a gentle jiggle when you nudge the bowl
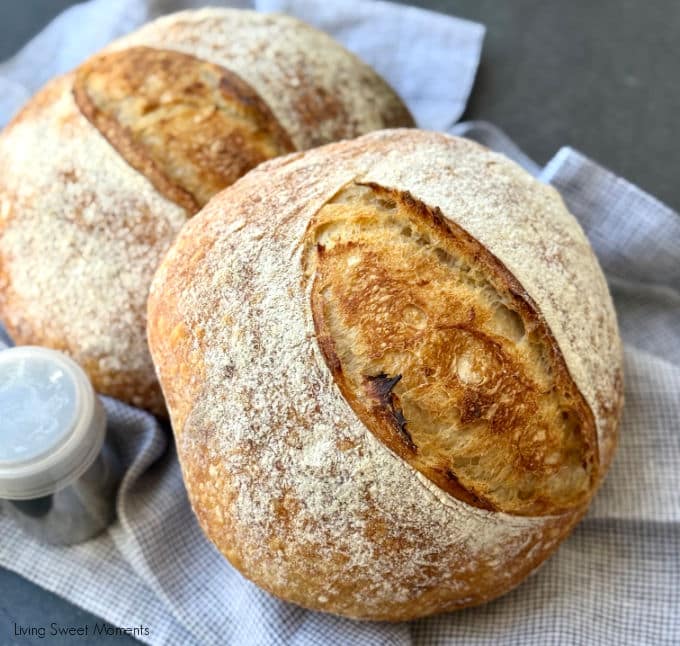
Preshaping and Shaping
After the bulk fermentation, turn the dough onto a lightly floured surface.
Preshape: Tuck edges under into a loose round; rest 20 minutes to relax.
Final shape: Build surface tension by gently dragging the dough toward you. Place seam-side up in a floured banneton or towel-lined bowl.
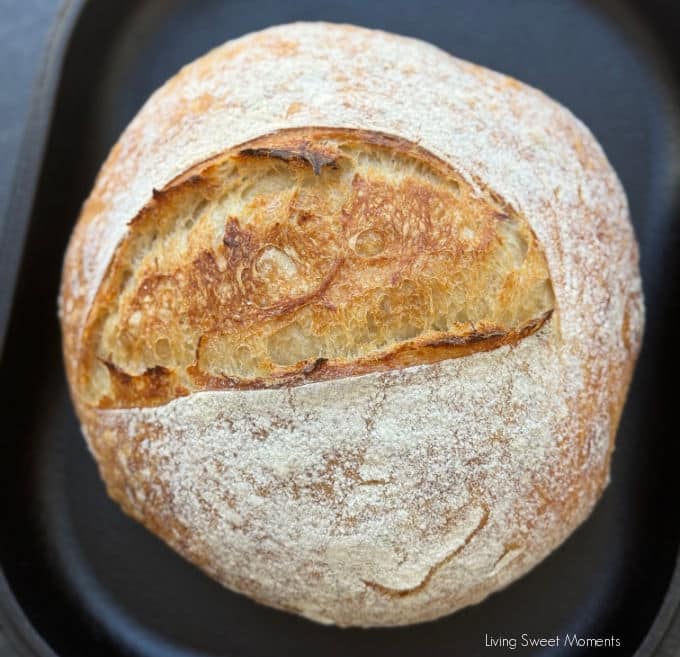
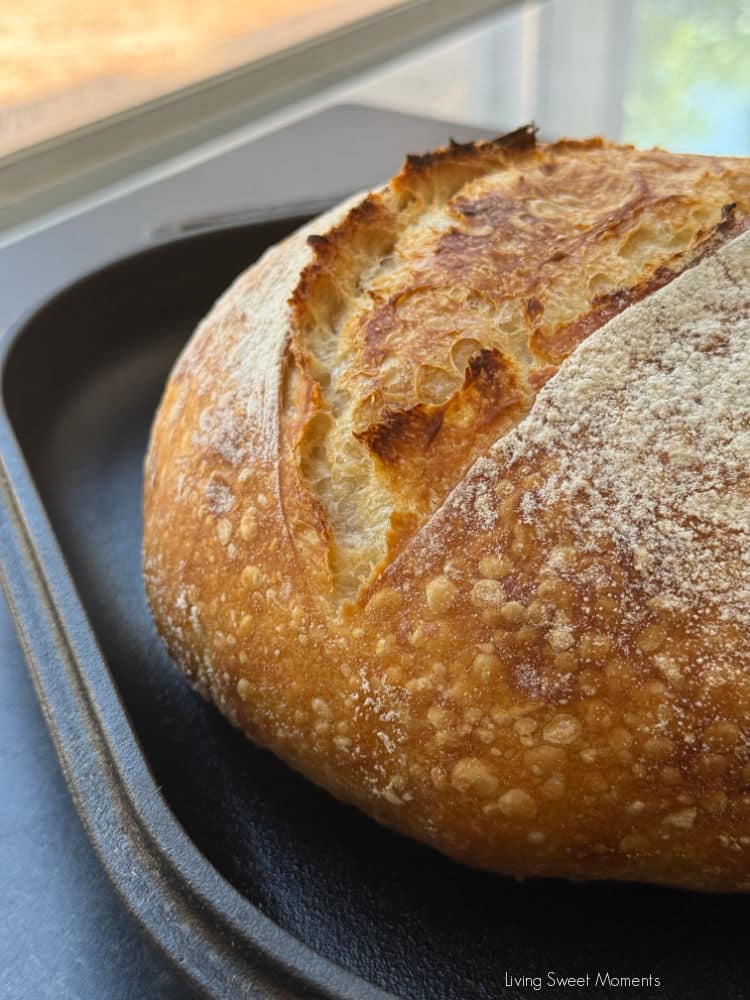
Scoring the Dough
Right before baking, score the dough so it expands where you want it to (controlled oven spring). Without scoring, it may burst randomly.
- Use a very sharp lame/razor
- Make a quick, confident slash about ¼ inch deep
- One long cut down the center is beginner-friendly
- Dust the top with flour if you want the design to pop
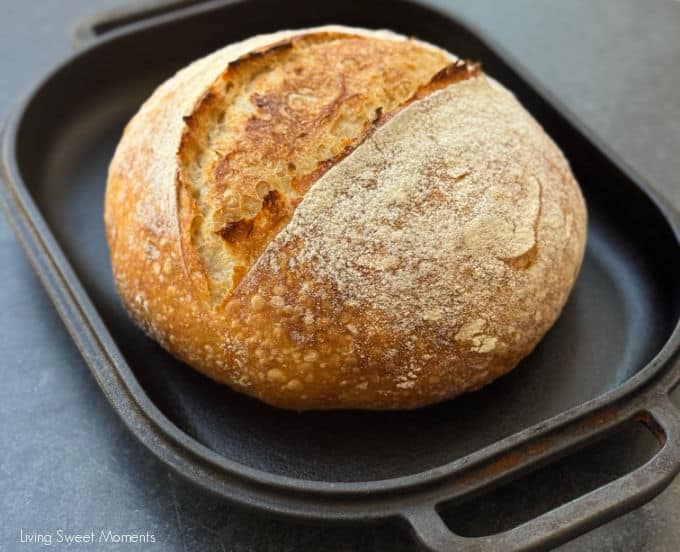
Why Bake in a Dutch Oven?
A preheated Dutch oven traps steam from the dough, recreating bakery conditions. Steam keeps the crust soft so the interior can expand, then the crust crisps once the lid is removed.
- Maximizes oven spring (taller loaf)
- Encourages a shiny, blistered, crackly crust
Bake, Cool, Enjoy
Bake covered for 20 minutes, then uncovered for ~20 minutes more until deep golden. Internal temperature should be 208–212°F. Cool at least 1 hour before slicing.
Storage, Shelf Life & Freezing
Beginners often ask how to keep sourdough fresh. Here’s a friendly guide for day-to-day storage, plus freezer tips.
Quick reference
- Day 1: Store the loaf cut-side down on a board to keep the crumb moist and the crust crisp.
- Days 2 and 3: Use a paper bag or bread box. (Let the loaf breathe so the crust stays crackly.)
- 4+ days: Slice and freeze.
- To refresh: 350°F (175°C) — whole loaf 10–15 min, slices 5–8 min.
Room-Temperature Storage (1–3 days)
- Cut-side down on a board for the first day to prevent the interior from drying out.
- After day 1, use a paper bag or bread box for airflow. This keeps the crust crisp.
- Prefer a softer crust? A zip bag will soften the crust but may encourage mold sooner—use within 2–3 days.
Freezing (Best for 2–3 months)
- Cool completely. Any warmth traps steam and causes ice crystals.
- Choose whole or sliced. Slicing is convenient for single-serve toast.
- Wrap tightly:
- Whole loaf: Wrap in plastic/compostable cling or foil, then slide into a freezer bag. Press out air.
- Slices: Stack, wrap as a brick, then bag; or flash-freeze slices on a tray 30 min, then bag (no clumping).
- Label & date. Freeze up to 3 months for the best flavor.
Thawing & Re-Crisping
- Whole loaf: Thaw at room temp on a rack (still wrapped) 1–2 hours. Unwrap, mist lightly with water, then bake at 350°F (175°C) for 10–15 min until the crust is crisp.
- Slices: Toast straight from frozen, or oven at 350°F (175°C) for 5–8 min.
- Extra crackle: For a very crisp crust, give the loaf a quick 400°F (205°C) finish for 3–5 min.
Beginner sourdough bread recipe (Lower Hydration, Easy Handling)
Ingredients
- 500 grams bread flour
- 325 grams water room temperature
- 100 grams active sourdough starter
- 10 grams fine sea salt
- For dusting: rice flour or all-purpose flour
Instructions
- Feed Starter (if needed). Feed your starter and wait until it’s active: bubbly, doubled, slightly domed, and a spoonful floats in water
- In a large bowl, mix flour, water and starter until no dry bits remain. Cover and rest 30–40 minutes.
- Add Salt. Sprinkle 10 g salt over the dough. With wet hands, pinch and fold until the salt dissolves and the dough tightens slightly
- Every 30 minutes, with WET hands, do 1 set of turns: lift an edge, stretch up, fold over; rotate the bowl and repeat 3–4 times
- Let the dough rest until risen about ~50%, surface slightly domed, tiny bubbles at edges, and a gentle jiggle when nudged. Time depends on room temp (warmer = faster)
- Preshape & Rest. Lightly flour the surface. Gently turn out the dough, tuck into a loose round, and rest 20 minutes uncovered to relax
- Shape into a tight boule or batard to build surface tension. Place seam-side up in a floured banneton (rice flour works best)
- Proof - Preferred (deeper flavor): cover and refrigerate overnight (8–16 hours). - Same-day (milder flavor): proof at room temp 1–2 hours until slightly puffy
- Place the dutch oven (with lid) in the oven and preheat to 475°F (246°C) for at least 30 minutes
- Turn dough onto parchment seam-side down. Dust the top lightly with flour. Score a confident ¼-inch-deep slash. Lower into the hot pot.
- Bake covered 20 minutes at 475°F (246°C), then uncover and bake 18–25 minutes more until deep golden and ~208–212°F (98–100°C) internal.
- Cool on a rack at least 1 hour before slicing for best crumb and texture
- Enjoy!
Nutrition
Frequently Asked Questions
You may also like:
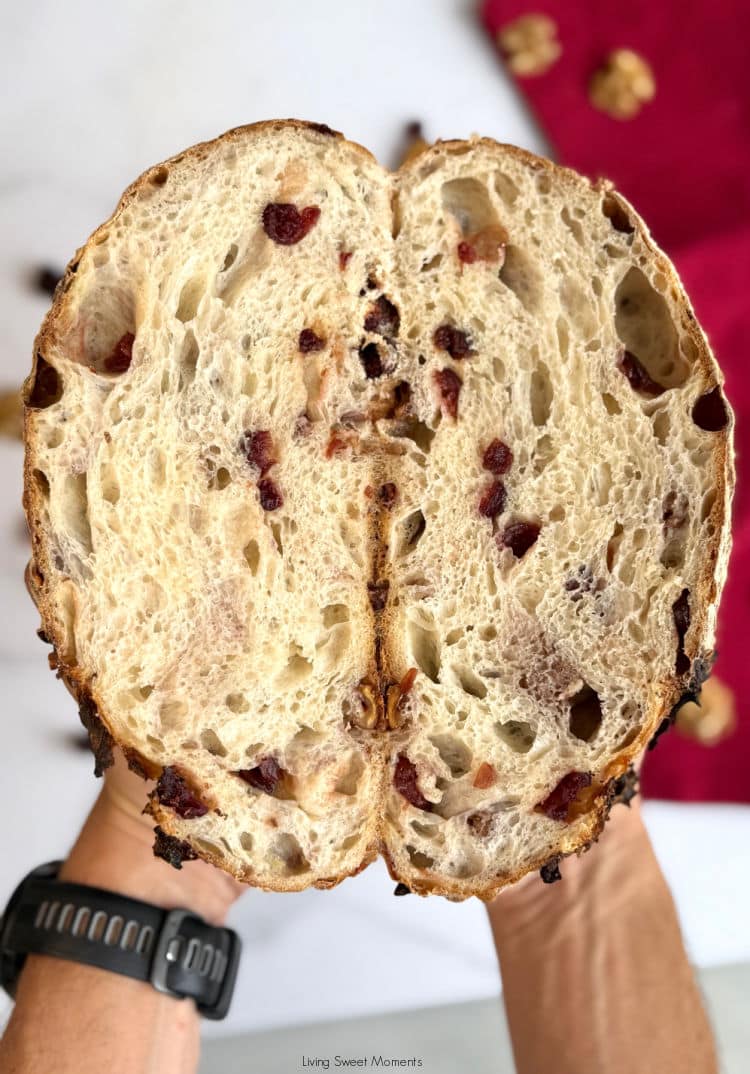
Cranberry Walnut Sourdough Bread


I can’t believe how easy it was to make! My bread was delicious and had a beautiful crust with a tangy flavor
you’re welcome Lynn! glad you enjoyed the recipe
Finally a comprehensive tutorial on how to make bread.
Mine turned out amazing! I added 2 cloves of roasted garlic and herbs de province on the second turn.
I will make this recipe again and again. Thank you!
Hi Pamela! those additions sound great! thanks for sharing and for your feedback!
Read this post and watched the video. Let me tell you Tiffany, this bread was outstanding! my family loved it. Next time I will make 2 breads
I just made my first sourdough loaf thanks to you! it was really tasty
Yay!! So glad to hear that Diana! now that you started, you won’t be able to stop! Happy Baking 🙂